
Friday, January 3, 2014
FLASH SALE!
Our shop is having a FLASH SALE today! Head over and use coupon code NY2014 and receive 35% off everything in the shop! Don't forget to share these awesome savings with your friends too :)
Tuesday, November 5, 2013
Quilt Custom Order
This quilt was a custom order for someone my hubby works with. It's a lap quilt with a finished size of 55"x66". The top is cotton with a satin interior border. The back and binding are the same satin that I used for the interior border. She specifically asked for satin to be on the back. To be perfectly honest, that part scared me. I have never worked with satin before this project and was worried about how slippery it is. I used a my walking foot when I was quilting it which seemed to help immensely!


-Lisa


-Lisa
Friday, October 11, 2013
Weekend Sale!
In celebration of the long weekend we are having a sale! Head on over to the shop and pick up something fun for your little one. Use the coupon code SUNSHINE15 to receive 15% off through Monday!

Thursday, October 10, 2013
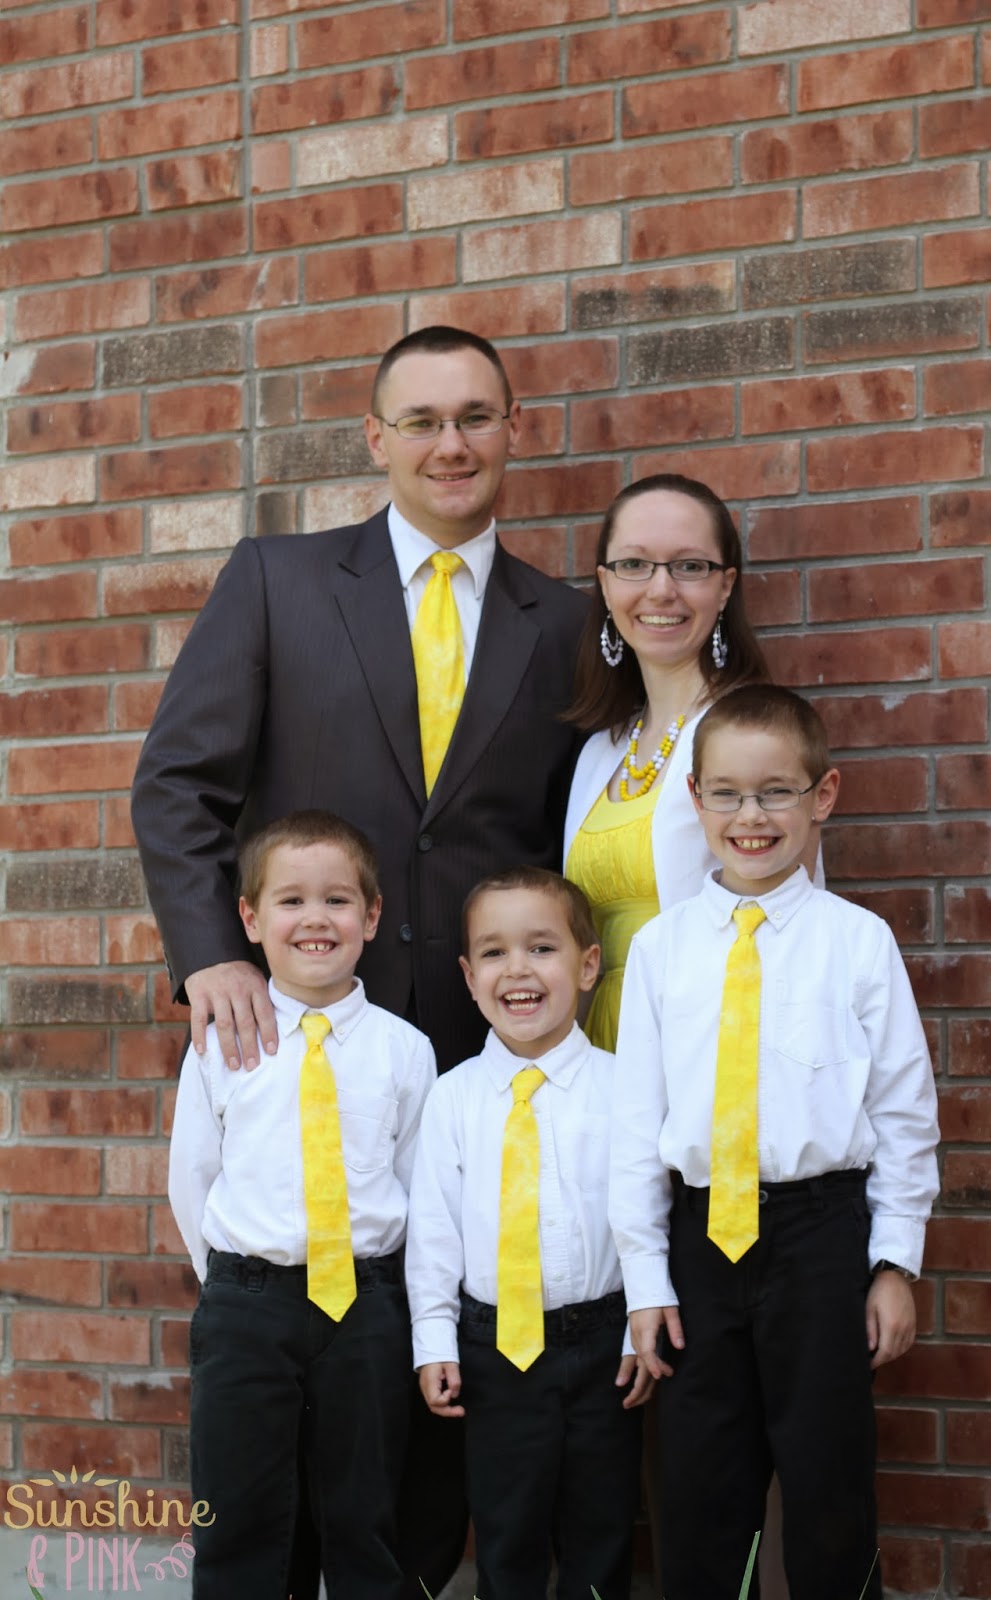
We Haven't Forgotten About the Boys!
When Maria and I started talking about opening our shop I was really excited. We were going to make clothes for little girls. How fun! I mean, I have three boys, whom I love dearly, but let's be honest...there just aren't as many patterns out there for boy clothes as there are for girls. I have had so much fun making twirly, ruffly dresses. But, the whole time there was this nagging little voice in the back of my head that said, "don't forget about the boys!" I had a few things to finish up with the girl dresses and then the big custom order to work on before I could devote time to boys clothing. The time has arrived though - boys clothing is here! We are starting out with neckties for your little man. Oh, man, I just love these ties. I have been working on this tie pattern for the last three years or so. I have finally perfected it though and am ready to send ties out to the world for other little boys to enjoy.


The 21 ties I have made for my boys. I love seeing the boys wear them to church every Sunday.

We had fun matching for Easter this year.
These blue ties were the first ones I made for them. The boys wore them for my sister's wedding back in 2011.

The purple ties are the most recent ties I made for the boys. They wore them for my brother's wedding that was back in July.

It's so fun for me to see how excited the boys get when they see me working on new ties for them. Some might even say that a boy can never have too many ties :)
The first ties are in the shop now, just waiting to be worn and loved by little boys! To make things even more awesome, each of the ties listed has a matching dress.
This orange tie is perfect for fall. It makes me think of pumpkin pie :) The matching dress for sister can be found here.

When two of my boys saw this tie they got really excited and asked if it was a new tie for them. When I said that it wasn't they were sad. I know what they're getting for Christmas this year! There are actually three dresses that match this tie! You can find them here, here, and here.

Last, but definitely not least is this happy yellow tie. Bring some happiness to your little man's wardrobe! Don't forget the matching dress :)

Tuesday, October 8, 2013
Value Table Cloth
My aunt has been working with the young women in our church. She was getting ready to give a lesson on unity and wanted a visual aid to help illustrate her point. One day she called me up with the idea of having a table cloth with girls holding hands (like paper dolls) wearing dresses in the colors of the young women values. Here is what I came up with!


Is this something you'd like to see in the shop? If it is, leave us a comment!
--- Lisa


My aunt was so sweet and sent me a picture of the table cloth in action!

Is this something you'd like to see in the shop? If it is, leave us a comment!
--- Lisa
Saturday, October 5, 2013
Infant Seat Redo
Two years ago Maria was getting ready for baby number six to arrive. She was having tons of fun making a matching diaper bag, moby wrap, and nursing cover. I commented to her that she was making so much that there wasn't going to be anything I could give her for her baby shower. Jokingly she suggested that I re-cover her infant seat. Not long before that I had seen a tutorial from Ashley at Make it and Love it on re-covering an infant seat. I told her that I would do it! To say that I was nervous though would have been an understatement. What if I totally messed the whole thing up!?


 -- Lisa
First I took everything apart, taking LOTS of pictures along the way. I didn't want to forget where each piece went since I didn't have another seat to reference if I forgot how it went back together.


In Ashley's tutorial she took the original fabric off of the padding. I decided to keep the original fabric and just put new fabric right over top of it.

I was actually quite surprised at how quickly the whole thing came together. It really wasn't nearly as hard as I had envisioned it to be.


I also made a head support piece that can be removed.

And just for fun - a side by side comparison :

Wednesday, October 2, 2013
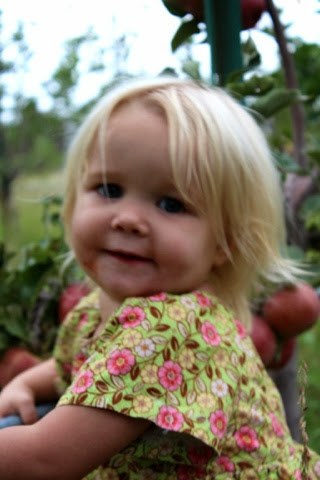
Apple Picking
Our
ward went Apple picking on Saturday. My oldest wanted to stay home and
have a day to himself, so I took the other kids and off we went. I forgot how cold it was in the mountains and poor C was cold.
It's cold up here in the mountains.


L had fun and filled her own bucket with a little help.


K must have gotten a sour one.


T loved picking apples and got upset when the buckets were to heavy for her to carry.


J was so excited to find a couple of red delicious apples.


Team work is best!


My
favorite part of the day is when L picked flowers and brought them
to me and said Momma " these are for you I love you soo much" and gave
me a kiss.

C is wearing a twirly strip skirt that I made in Korea.
T is wearing the Miss Lily by The handmade dress by Smantha Caffee
Subscribe to:
Posts (Atom)